Hyrax must have at least one Admin set in order for users to add content to the repository. Repository Administrators can create additional Admin sets as needed. Admin sets are advised to use when you have a set of works that need default behaviors and/or permissions. For example, if you have a set of works that specific users need to be able to edit or view. Admin sets also work well for sets of works that need to follow a particular publishing workflow, like supporting the mediated deposit of student papers.
You must create at least one Admin Set. This is usually done at the time of setup. All works in your repository must belong to one, and only one Admin Set. Repository Admins can create additional Admin sets as needed.
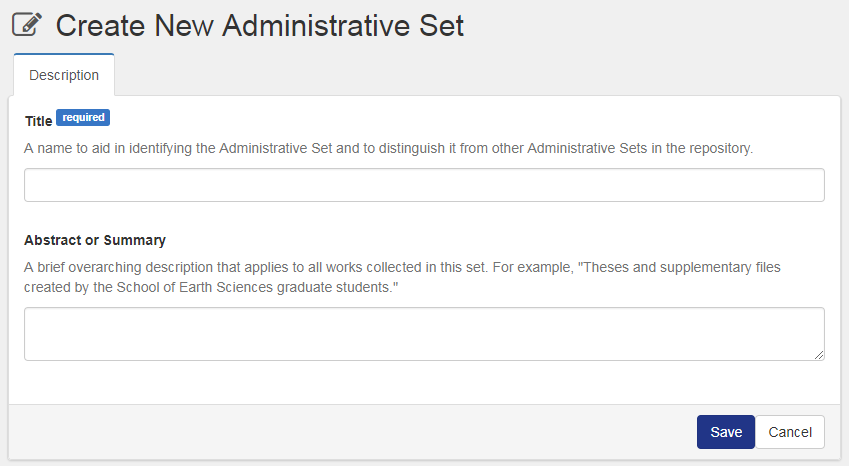
To create a new Administrative Set
As a Repository Admin, navigate to your dashboard and then to Collections on the left hand menu. Click “New Collection” in the upper right. Select “Admin Set” in the dialog box and click “Create collection”
- Description: Assign a title and description.
After clicking save you have additional configuration options:
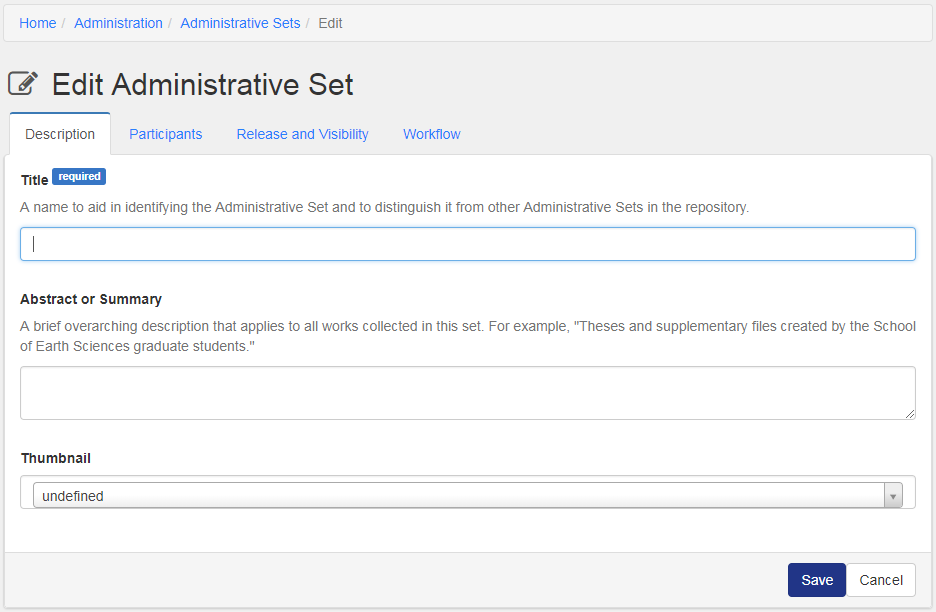
- Participants: Use this tab to grant groups of users or individuals role based permissions to the Admin Set.
-
Please note: When you add an individual as a participant to an Admin Set, those permissions ONLY apply to items added AFTER the participant was added. Likewise, removing individual participants from an Admin Set does NOT remove their access to the works added previously, but only removes access to those works that are added to the set AFTER their permission is revoked. If you want to grant access users to all works in an Admin Set regardless of when the work added, it is recommended that you utilize the Groups permissions at the time of Admin Set creation (before new works are added). That way you can add and remove individuals from groups any time. There is currently no way to create adhoc groups but an external grouping system may be integrated.
-
Default roles include:
- Viewer: Can see items in the set regardless of visibility settings on the individual works. These can be viewed by searching for the works. Viewers can not navigate to Admin Sets via the dashboard.
- Depositor: Can deposit to the Admin Set. Clicking Allow all registered users, allows anyone who logs in the right to deposit to that set. This might be useful for Admin Sets like “Open Access Articles”.
- Manager: Can see and edit all works in the set regardless of visibility settings on the individual works. Can change the details about the Admin Set itself.
-
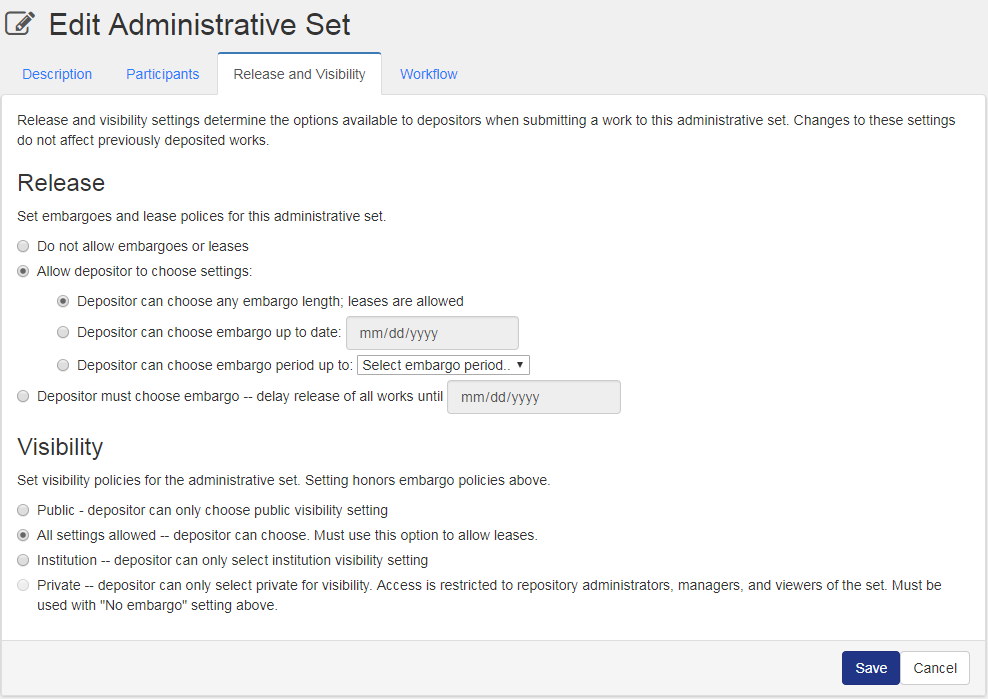
- Release and Visibility: Use this tab to apply policies to each set. These policies determine what options a depositor can choose when submitting a work to a specific admin set. For example, if you have a collection of Open Access Articles and you do not want to allow users to apply embargoes, you can enforce that for an entire Admin Set. These visibility settings do not affect the Visibility badge users will see in the collections dashboard. The visibility badge associated with all admin sets will always be
Private. Because admin sets do not have their own landing page, like other types of collections, they cannot be found by end-users. Settings are ‘shown’ to all depositors but prohibit depositors from selecting certain settings based on the Admin Set’s configuration. Changing these settings do NOT affect the works already in the set. Notes: Use this with caution as these cannot currently be overridden even by Repository Admins.
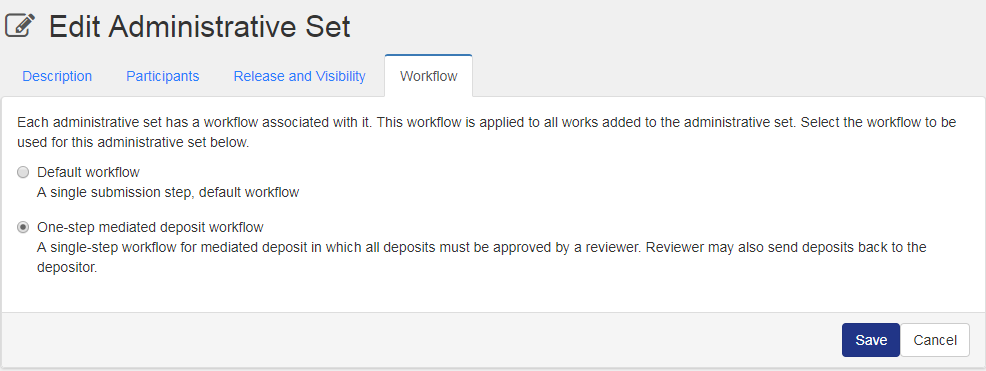
- Workflows: The two workflows that are included out of the box include Default Workflow and One-step Mediated Deposit. Every Admin Set with have the Default Workflow unless otherwise specified. See the workflow section for more information.
- Setting a thumbnail for the set - you can select a thumbnail on the Description Tab, however you must select an image in the set. Select from an existing file or add a new one.
- Editing an Admin Set - Navigate to the Admin Set via the Dashboard and click the edit button on the page.
- Deleting an Admin Set - You must first delete all items in an admin set in order to delete the admin set itself. Deletion is permanent and can not be undone.
Mediated Deposit/Workflow
Workflows dictate how a Work moves through review and publishing stages in your repository. There are two workflows that come with Hyrax, Default Workflow and One-step Mediated Deposit. Every Admin Set has the Default Workflow unless otherwise specified. Custom workflows can be created to accommodate additional use cases.
Default Workflow: With this workflow applied to your Admin Set, all deposited works become available to the public without any mediation required. As soon as someone saves a work in the repository, it becomes available according to the visibility settings assigned at the time of deposit.
Example: Use the Default Workflow for a “Scholarly Posters and Presentations” Admin Set that does not have any visibility requirements and you want the posters and presentations to be available immediately.
One-step Mediated Deposit: With this workflow applied to your Admin Set, all works must go through a mediated review process before the works become available to the public. With this workflow, a specific user is granted the ability to approve, ask for changes and comment on a particular work.
Example: A department requires students to submit a Senior Honors Thesis, but faculty must read and approve them before they are available to the public.
Set up a mediated deposit workflow:
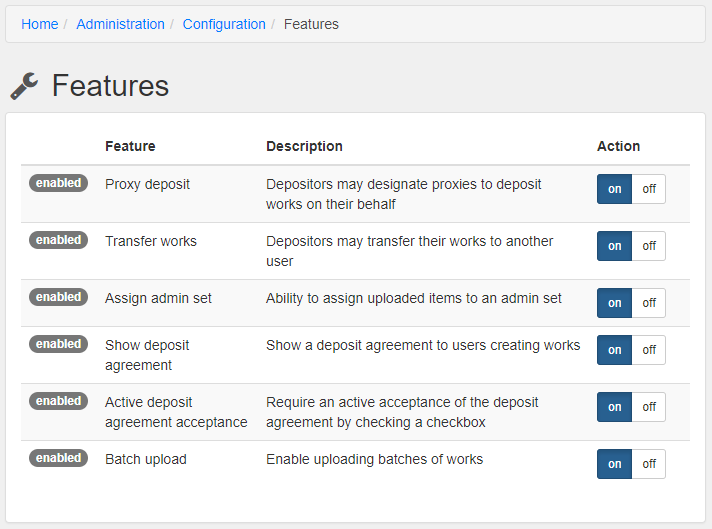
- Click on “Settings”, then “Features” in the Dashboard. Turn on the setting “Assign Admin Set” to allow users to upload to admin sets
- Navigate to the admin set that you’d like to use and click “Edit”. Click the “Participants” tab and select “Allow all registered users to deposit” or add a specific group.
- Add managers who will become “Reviewers” of the set. You do not need to assign these roles under “Workflow Roles” unless you have set up a custom workflow.
- Click the Workflow tab and select “One-step Mediated Deposit Workflow”
Reviewing Works in Mediated Deposit:
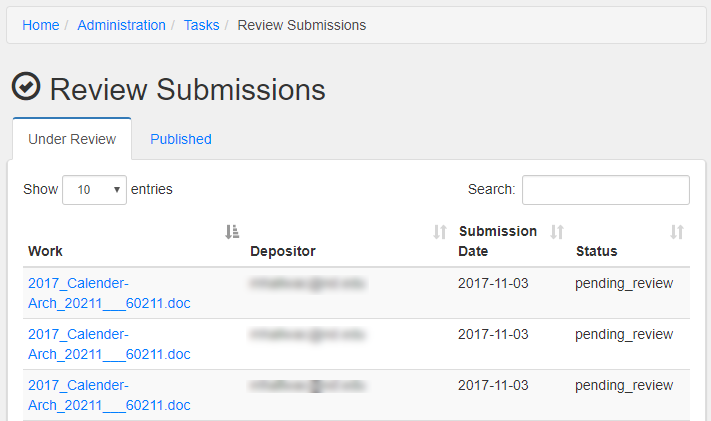
- In the Dashboard, click on “Tasks,” then “Review Submissions.” You will see a list of works requiring your review. Repository Admins will see all works in the repository, other reviewers will only see works in Admin Sets for which they are designated Managers.
- Click on a work that needs review: The “Review and Approval” bar will appear at the top of the page. Click on the “Review and Approval” bar to display three actions with an option to provide comments.
- Request changes - sends the work back to the student, then the student can make changes and resubmit.
- Approve - makes the work available immediately
- Comment only - this action should be chosen if there is a person in your workflow who needs to review, but not publish, the submission.
- Click “Submit.”
Note: Users given the “Manager” role on an admin set will always see the Review and Approval window, regardless of the status of the work. This is a feature meant to allow admin set managers to always have the option of requesting changes to a file or re-entering the workflow as needed.
Notifications help reviewers and depositors know when an action is required. Notifications can be accessed from any page by clicking the “bell” icon at the top right of the page.